
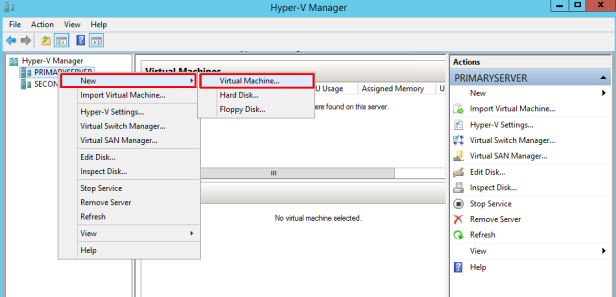
Open Hyper-V Manager in Server Manager.
Right Click the Hyper-V server and Click New Virtual Machine.
Note: If already have hard disk (.vhdx) then you can directly select it.
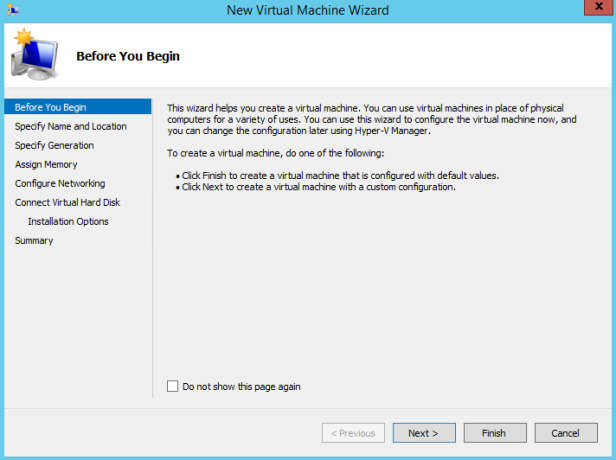
Deployment wizard starts. Click Next.
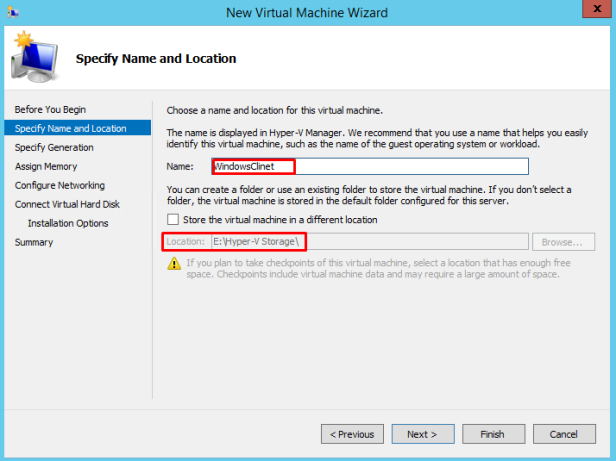
Type the name of the server.
Note: It installs the VM in default location, if you want to install in different directory then select the check box Store the virtual machine in a different location and browse for the directory.
How to change default Hyper-V Settings/configurations
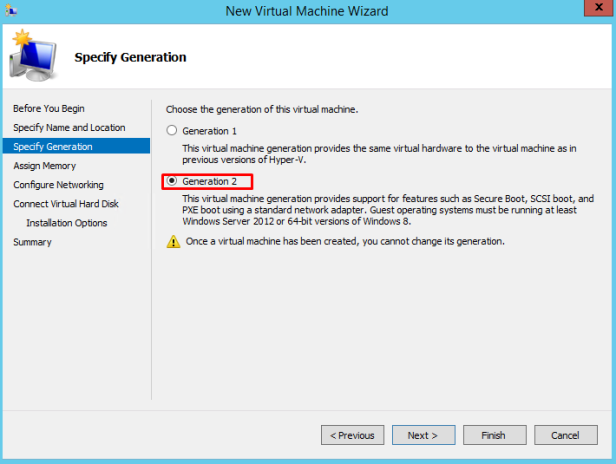
Choose the Generation of the virtual machine. I selected Gen 2 which has advanced features.
Gen 1 & Gen 2: Generation 1 virtual machine is same as a virtual machine running on Windows Server 2012 Hyper-V and earlier versions. Earlier virtual machines used BIOS based architecture. Generation 2 virtual machine uses EFI based architecture which provides a number of features as listed below:
- Secure Boot
- Synthetic Drivers at boot (VMBus)
- Boot from SCSI Virtual Hard Disk
- No Legacy or emulation devices
- Boot from SCSI Virtual DVD drive
- 20% Faster booting time and Guest Operating System installation time is reduced by 50%
- PXE Boot – Installing guest Operating System from network
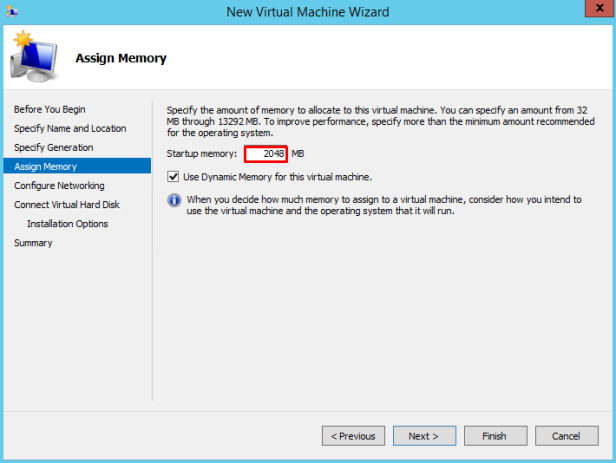
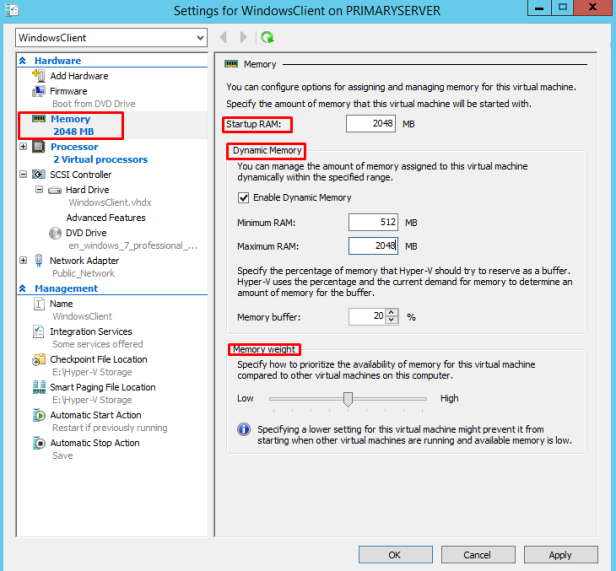
Enter the Startup Memory in MB and Select use Dynamic Memory for this virtual memory.
What is Dynamic Memory ?
Dynamic Memory adjusts the amount of memory available to a virtual machine, based on changes in memory demand and values that you specify. Windows requires more memory during startup than the steady state. As a result, administrators sometimes assign extra memory to a virtual machine because Hyper-V cannot reclaim memory from these virtual machines after startup. In Windows Server 2012, Dynamic Memory introduces a minimum memory setting, which allows Hyper-V to reclaim the unused memory from the virtual machines.
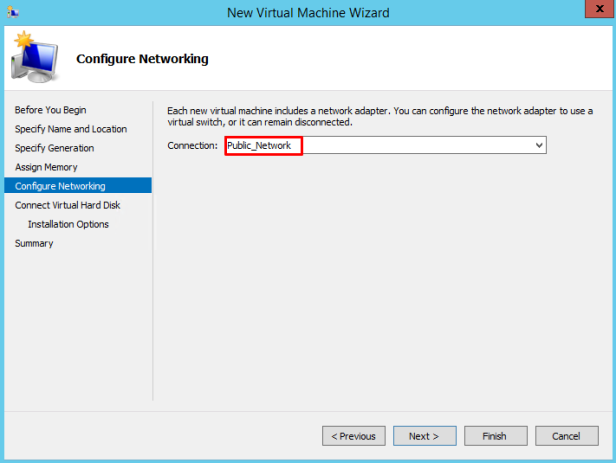
Select the virtual switch in the drop down menu.
Hyper-V Network Configurations
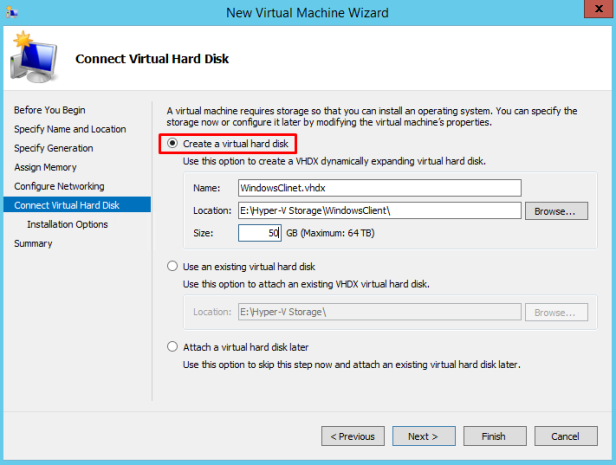
Next, create a virtual hard disk and select the location and size of the hard disk.
Note: Use an exisiting virtual hard disk if you have or select attach virtual hard disk later.
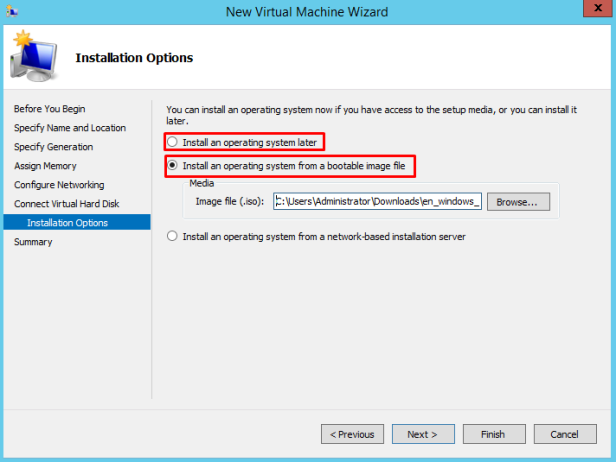
Select Installing OS option, installating later or install form bootable image file or else through network based installation (available only in Gen 2). Then Click Next.
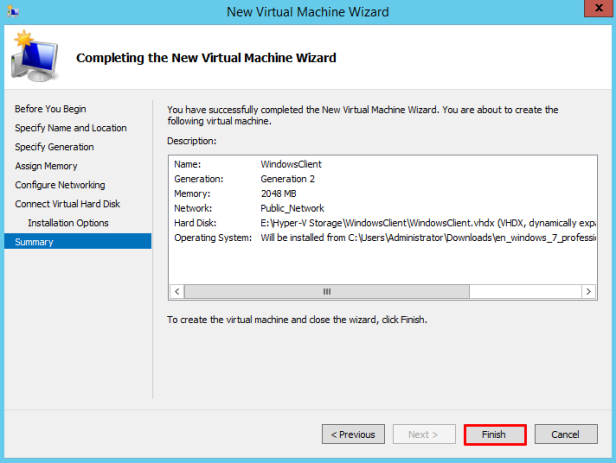
Finally Review Summary and Click Finish.
Now to change/edit settings, Right Click the VM created and select Settings.
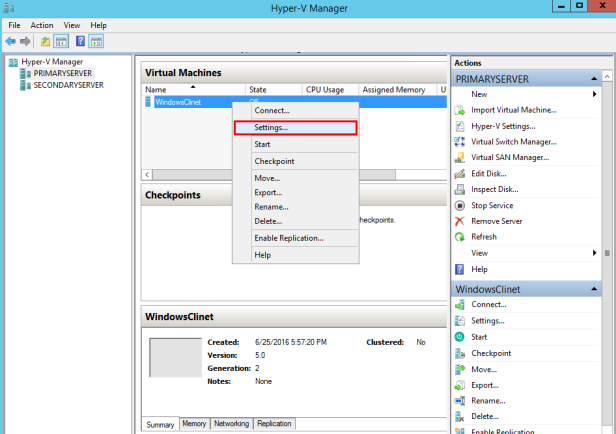
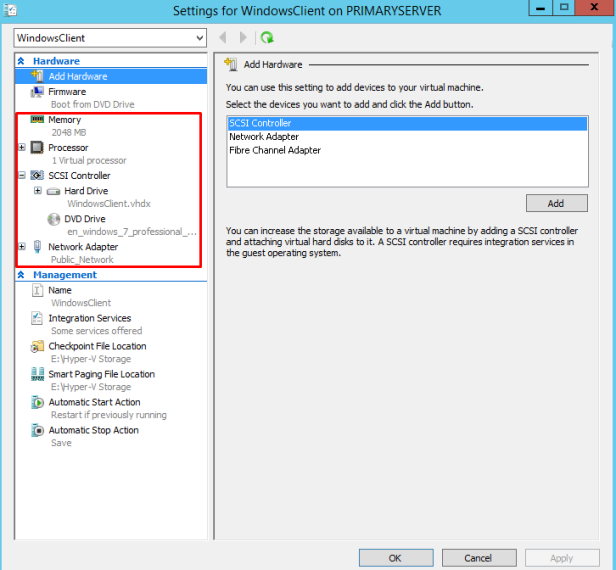
Below screenshot shows the editable options.
Select Memory and configure the Dynamic Memory settings i.e Minimum and Maximum Memory for the VM and specify the Memory Weight.
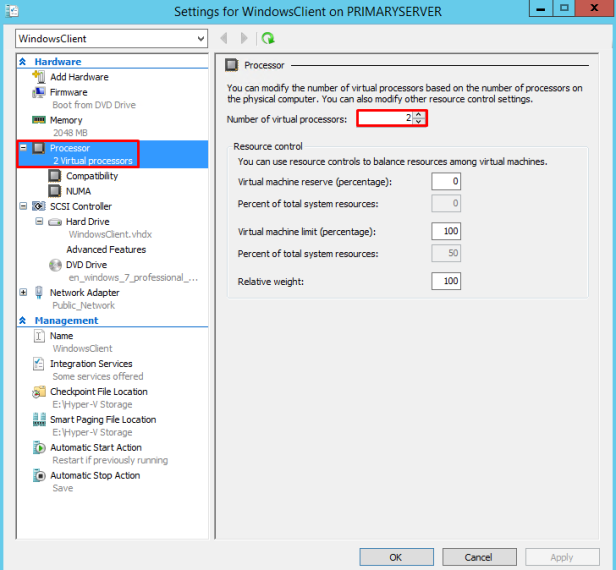
Select the Processor and Enter the Number of Virtual Processors and also resouce control settings.
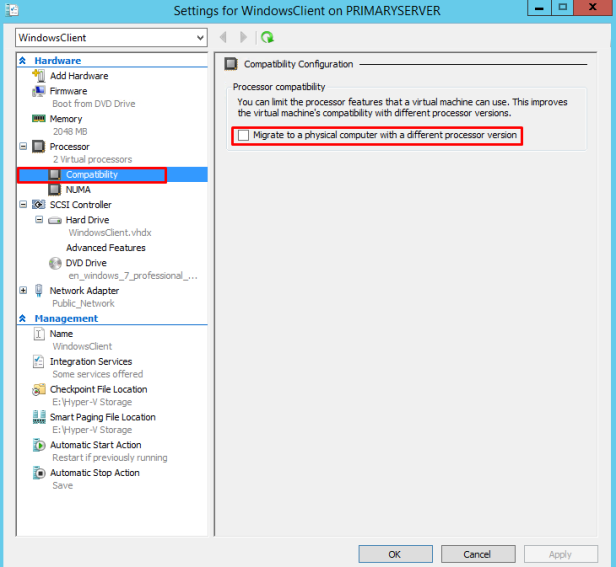
Select Processor Compatibility setting and Select the Option Migrate to a physical computer with different processor version.
Note: Guest OS should support this feature or else guest os required reboot.
Configure the NUMA settings.
What is NUMA ?
NUMA helps multiprocessor VM scale better. With NUMA, VM processors and memory are grouped into nodes and nodes can be grouped into sockets. Aligning the nodes and sockets of a virtual machine to the hardware topology helps impprove performance of NUMA aware workloads.

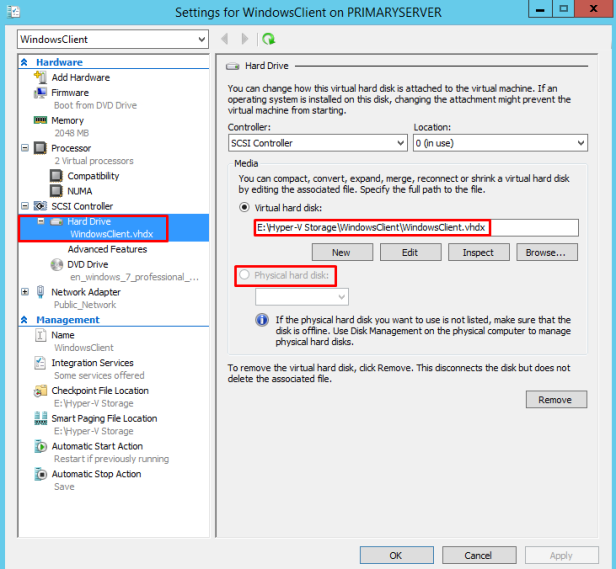
Select the Virtual Hard disk or directly physical hard disk which is physical hard disk or volume of the Hyper-V server directly connects to VM.
Use the Edit option to increase the disk size.
Note: To use the direct physical hard disk, disk should be offline in Physical server.
How to Resize Disk Size in VM Running in Hyper-V Step by Step Procedure
How to Add New Virtual Disk to VM running in Hyper-V Step by Step Procedure
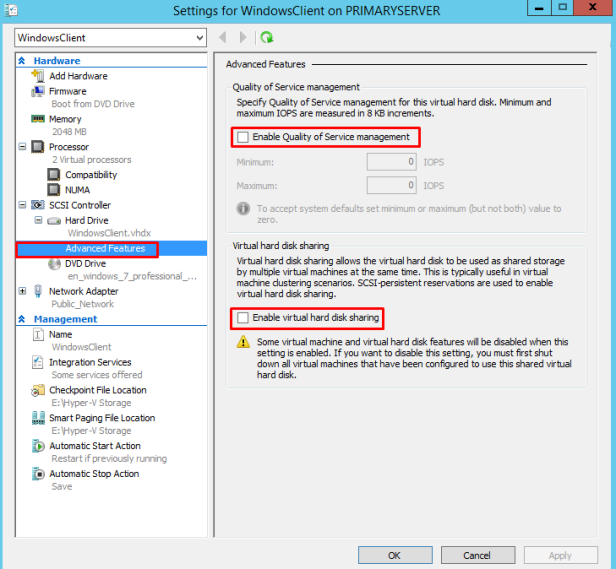
In advanced features, choose quality of service management with the minimum and maximum number of disk IOPS.
Also if required enable virtual hard disk sharing which is shared or used by multiple VM at the same time.
What is IOPS ?
IOPS is the standard unit of measurement for I/O (Input/Output) operations per second. This measurement is a performance-based measurement.
Total IOPS: Average number of I/O operations per second.
Read IOPS: Average number of read I/O operations per second.
Write IOPS: Average number of write I/O operations per second.
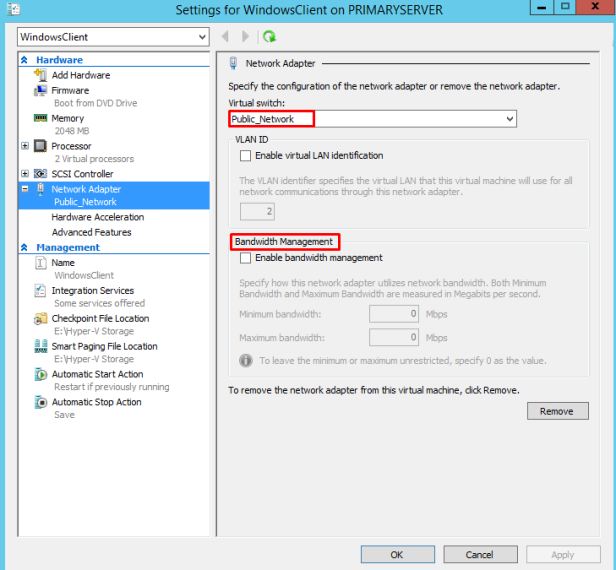
Select the Virtual Switch and VLAN if any.
Also select Bandwidth management with minimum and maximum bandwidth server can generate.
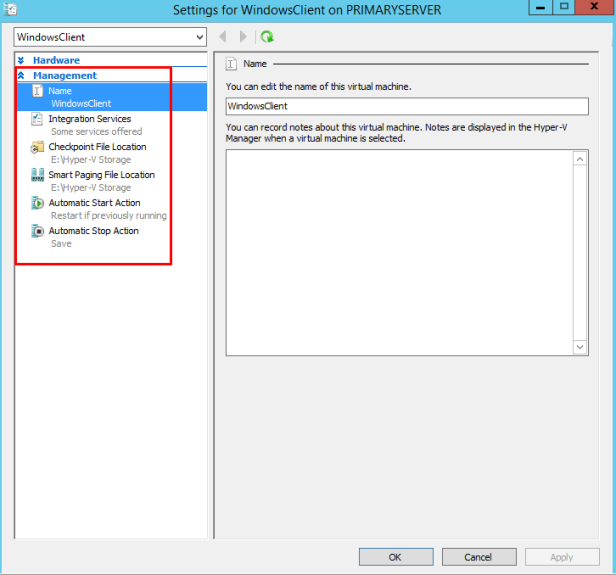
In Management Section, you can select the integrations services and default locations of Checkpoint, Smart paging.
You can also set the Automatic Start & Stop Action in this management section. Then Click OK.
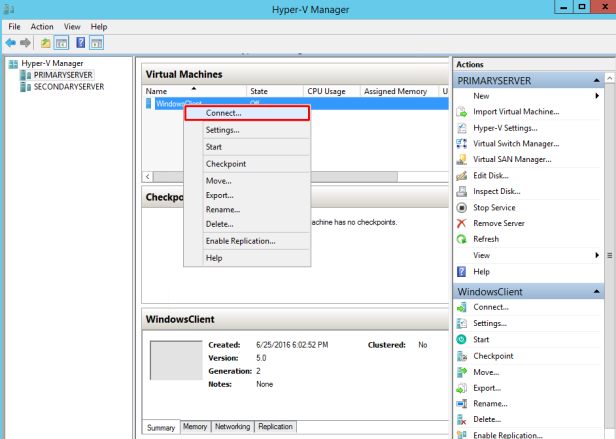
Once every settings are configured then Right Click the VM and Click Connect.
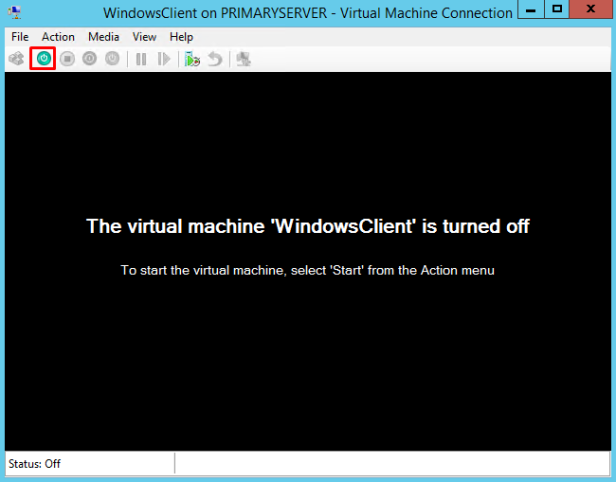
Now the new window will Open and Click the Start icon to start the server.
Next same procedure of installing OS on physical server.

Thanks , Very Useful this session
LikeLike
Very useful this session
LikeLike